|
After our success with the Peersonic detector working in-flight (see our blog post here) we decided to push on and get some actual field testing done! This will be the first time we've attempted to use the UAV to record actual BATS!
The first thing to do was identify an area in which is likely to have some bats flying around and that we can fly the UAV at. Fortunately, our flying site in Oxfordshire has a lovely line of trees with woods and hedges at both ends which look quite promising. During the day we set up a flight path which took us down the tree line, over a hedge at the end, looped round the wood then cut in towards the tree line again heading back towards us and past the wood at the end with a final turn taking us over a hedge and back to the starting point. The whole route took about 6 minutes 30 seconds to fly. Although the description is all very well and good a picture of the route might be more useful:
We flew this a number of times to ensure we weren't too close to the trees or in danger at any point. To do this we used a FPV (first person view) set up on the plane in order to assist in distance perception to trees. It turned out that this was fairly crucial as during the first run we were a little close to the trees. After some minor changes to the flight path we repeated the route and were happy with it. We decided on an altitude of 15 m to make sure we'd have more than enough clearance for any objects. Here's the plane's view of the flight path:
On to the night flying! With the route set, we were ready for the night flying with the detector. A bit of fiddling later and we'd set off on our first pass of the route. It's a strange feeling watching the lights of the plane sail off into the distance. It's great to see how stable the plane flies at night as well when the wind was a little lower. After two passes we decided to take a walk up to the woods at the start of the tree line to see if we could find any bats using our other detector. Happily we noticed one or two commuting down a hedge line that connected to the woods. A short re-route of the flight plan later and we had a flight running down the hedge line at an altitude of 8 m and 15 m horizontally from the hedge. Have we recorded a bat?! When looking through the sonogram, we noticed this: 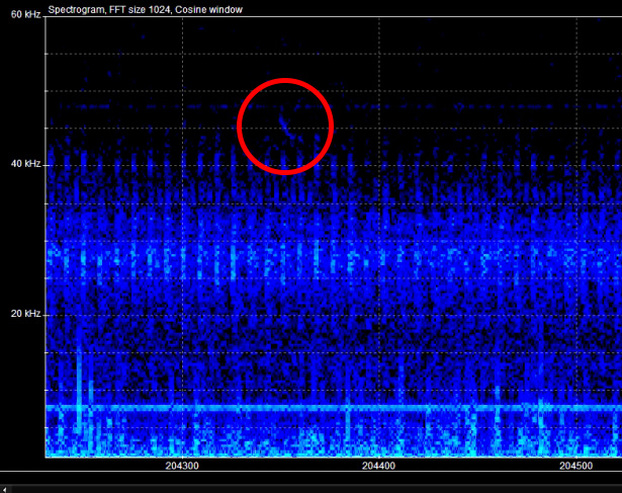
Is this our first recorded bat call?
Between 204300 and 204400 ms there's what looks like a 45 kHz bat call. The sound lasts for a duration of approx 7 ms and has a classic hockey stick appearance. It's also at bang on 45 kHz which ties in with a 45 pip.
There is however, a lot of ultrasonic interference from the motor/propeller and we want to be sure that this is a bat. HERE'S THE LINK TO THE RECORDING: If you have any experience we'd really appreciate your thoughts. The full .wav file is accessible via this link (right click - save as). Please feel free to download let us know what you think. As always, we'd like to acknowledge Peter at Peersonic.co.uk for his constant support and providing the recording equipment that has been so useful in progressing this project. Thanks, Tom & Tom
1 Comment
Following on from our post here about our new detector from PeerSonic we went ahead and did some testing with this on the plane. We wanted to ascertain how the plane/detector performed for two criteria:
For a quick reminder, here's the set up we were using as modelled by Tom A: 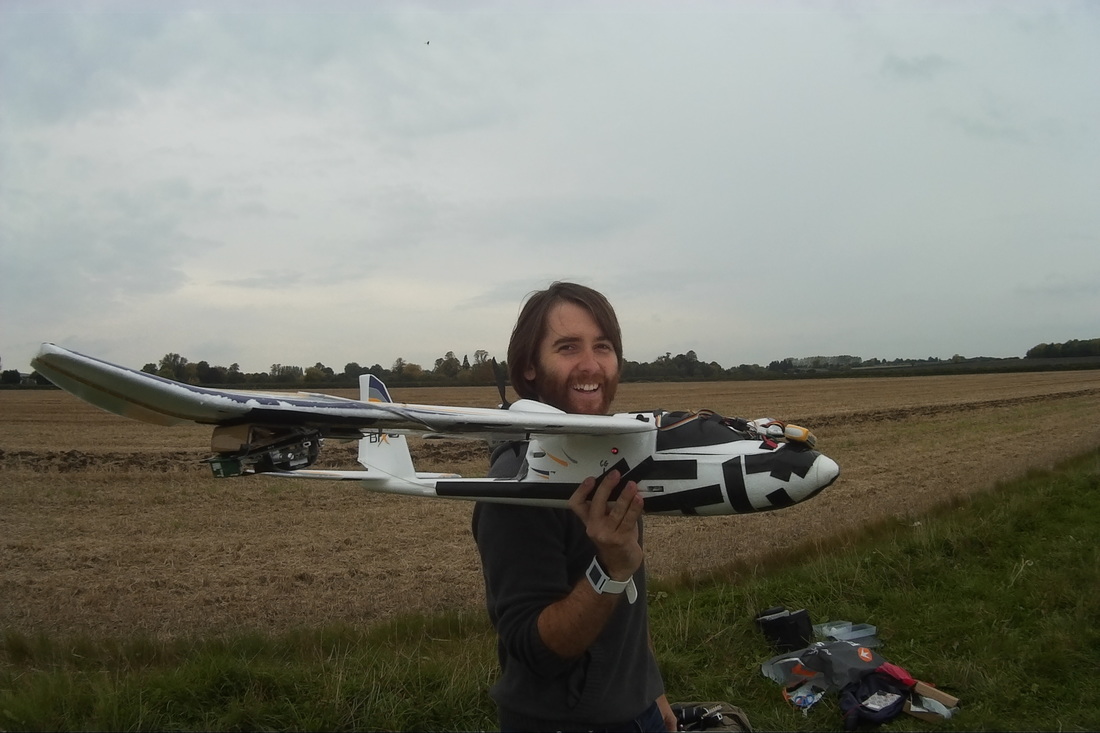 Wing mounted detector set up The position of the detector on the wing tip is not ideal. It leaves the detector open to damage upon landings and adds additional weight at an extreme position relative to the centre of gravity which must be counterbalanced and gives rise to instability. For flight testing, we balanced the weight of the detector with a bag of sugar on the opposite wing. We're currently working with Peter at PeerSonic for a solution to this where we'll hopefully have the microphone separate from the detector and be able to mount the detector more centrally (relative to the centre of gravity for the plane). So, how did it fly? There was a noticeable instability in the roll element of the flight but nothing that the flight controller stabilisation and pilot input couldn't correct. This was more apparent when windy but the plane was definitely flyable in this configuration. For the ultrasound detection testing we flew two passes at roughly 10 m from the detector horizontally and at altitudes of approx 10 m and 20 m. Here are the sonograms from these passes: 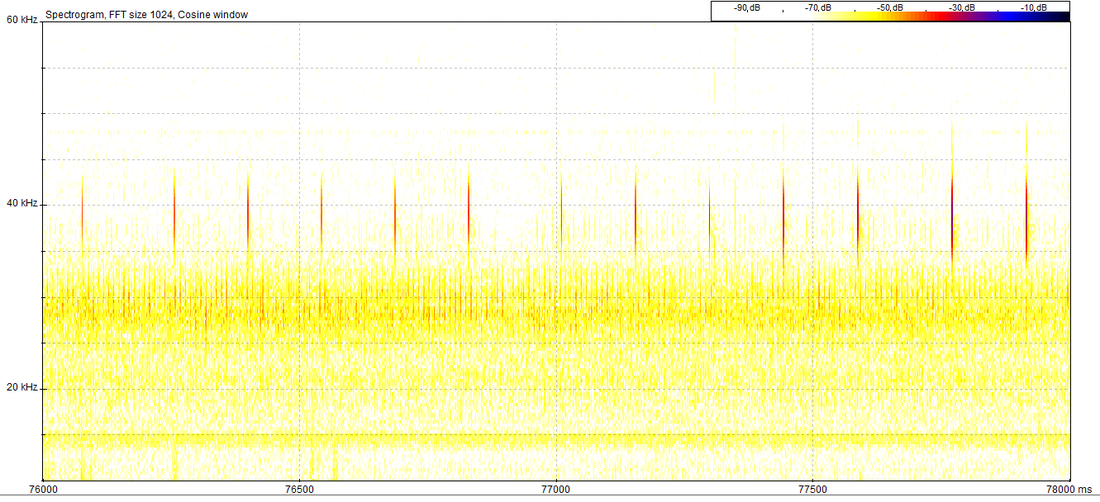 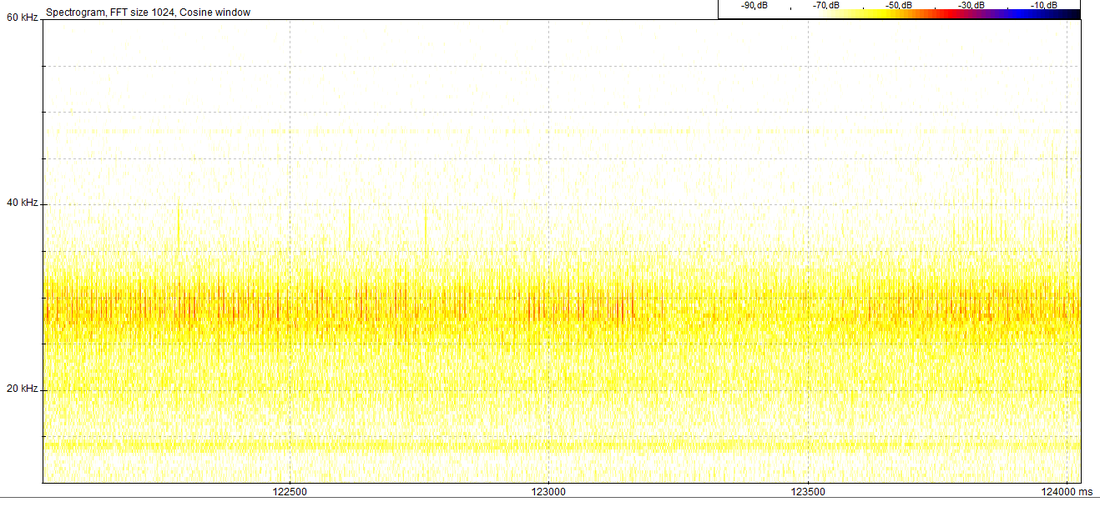 The ultrasound source is easily visible at 10 m, especially as it's a different frequency to the propeller interference. At 20 m we can see that the ultrasound source is hardly detectable.
Fortunately, we expect bats to be somewhat louder than our ultrasound source and hope to be able to detect at 20 m and perhaps even further. So, great news! We now have a working prototype for the Bat UAV! In the next post, we'll be doing some actual field testing and see if we can record any bats! In a bit of a testing lull, we thought it might a good idea to update you on the sort of kit that we're now using as this has changed somewhat from the first post about this here.
We've moved away from the quadcopter for a while now and have been testing a plane instead. This post is about the cost and suppliers of the stuff that we're using in case you would like to have a go at this yourself. So, let's take a look. The first thing to mention is that we're not going to be 'hearing' any bats without a decent detector. As mentioned in our last post about the new detector we've been using a prototype detector from peersonic.co.uk. It's a brilliant bit of kit being much lighter and smaller than anything we've seen on the market. Thanks as always go to Peter at PeerSonic for his help with this. We're also using a Bix3 from hobbyking (this link will take you to the Ready To Fly (RTF) version, we used the Plug aNd Fly (PNF) version but it doesn't seem to be on their website anymore). Something we haven't mentioned before is that we're also using a Spektrum DX8 transmitter. Have a look at our post here for why we went with a plane and this model in particular. Might be easier from this point to use bullet points for the rest of the stuff (all prices include VAT):
We also use program called Mission Planner to plan our routes on a laptop which we take into the field with us. This is the software that you connect to the Pixhawk with in order to plot waypoints and configure how the plane flies. Have a look here for the firmware we're using on the Pixhawk, it's all open source and free: http://plane.ardupilot.com/ So that just about covers everything that's required to put together something that we hope will have a decent chance of recording bats in flight. We do have future iterations planed design wise for the plane to further distance the motor/propeller and the detector so watch this space for future developments. Next time out in the field we'll be collecting some flight recordings with the detector and hopefully getting close to proof of concept. What do you need to be able to fly at night? Lights of course! Our first foray into night flying wasn't terribly successful, have a look at our post here. Fortunately, we've now gone for a bit more of a professional looking setup and all seems well. 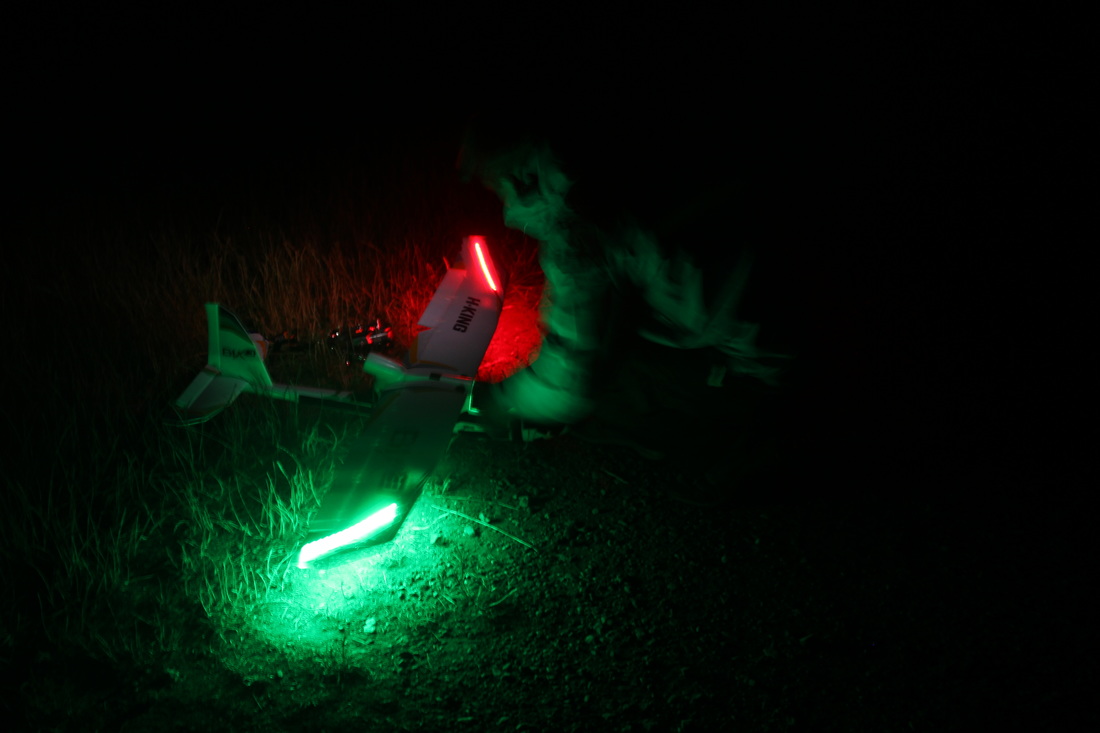 In keeping with other aircraft we decided to fit red and green lights to the wings of our plane to designate port and starboard respectively. They're fitted to both the top and bottom of the wings so we can see them even if the plane is banking. The lights we used were strips of LEDs that are powered by a 12V battery. This is the same voltage as our flight battery but we're using a smaller additional battery to power the lights as we don't want them to reduce flight time. As a short note, the canopy above the Pixhawk flight controller is also lit up as the Pixhawk has a green light on it when it's all systems go and there's a GPS lock. We weren't sure how bright the lights would appear at distance so wanted to have a short auto-pilot test flight. Check out the video here: Despite the fact that the lights look quite small and not terribly bright in the video they're actually very bright and easy to see. To give you a reference the landing was lit by car headlights on full beam. We're pretty happy with how the lights have turned out and think we'll be able to manage night flying with out too much trouble. It's all coming together! We have a rig that allows us to attach an ultrasound detector and recorder to a UAV (have a look here on how we did this), and we can use gliding flight to record without interference from the engine. So we gave it a go: Flying the drone around on a loop we used a ultrasound source to produce noises that the on board recorders would pick up. The results are promising. When flying overhead at around 20 meters the detector was able to pick up the ultrasound signals emitted from ground-level. Since bats are often flying at tree height this gives us a good chance of picking them up in flight. 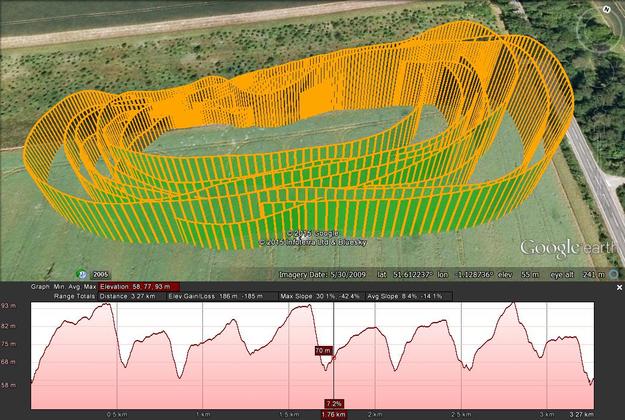 The flight telemetry from our test flight. You can see the gliding sections at the back flying right to left. Below is the elevation profile of the flight. The glide slope we experienced was approximately 3.5:1, meaning that for every 1 meter altitude lost we flew 3.5 meters laterally. This isn't particularly good and the glide slope was reduced by the fact we were flying into the wind whilst gliding. Although this provides additional lift, the reduced ground speed has a large impact on the slope. In future flights we'll fly the glides downwind as much as possible. The next step will be to plan and fly an autopilot mission using the gliding method to try and record an ultrasound source. It's worth noting that we don't think this is the ideal solution and would much prefer to be able to record all the time so we're looking at other options for this. In our previous tests we have shown that ultrasound interference is an issue (here and here) and that suspending the detector away from the engine is difficult (here, here, and here). One way to beat this problem is to turn off the engine and glide. If we take this approach then the detector rig can be mounted on the aircraft directly. A couple of things to consider:
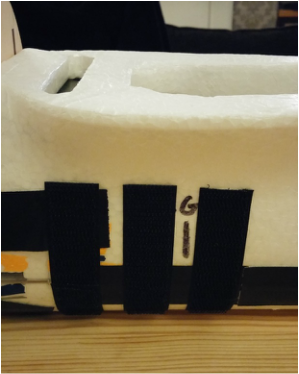
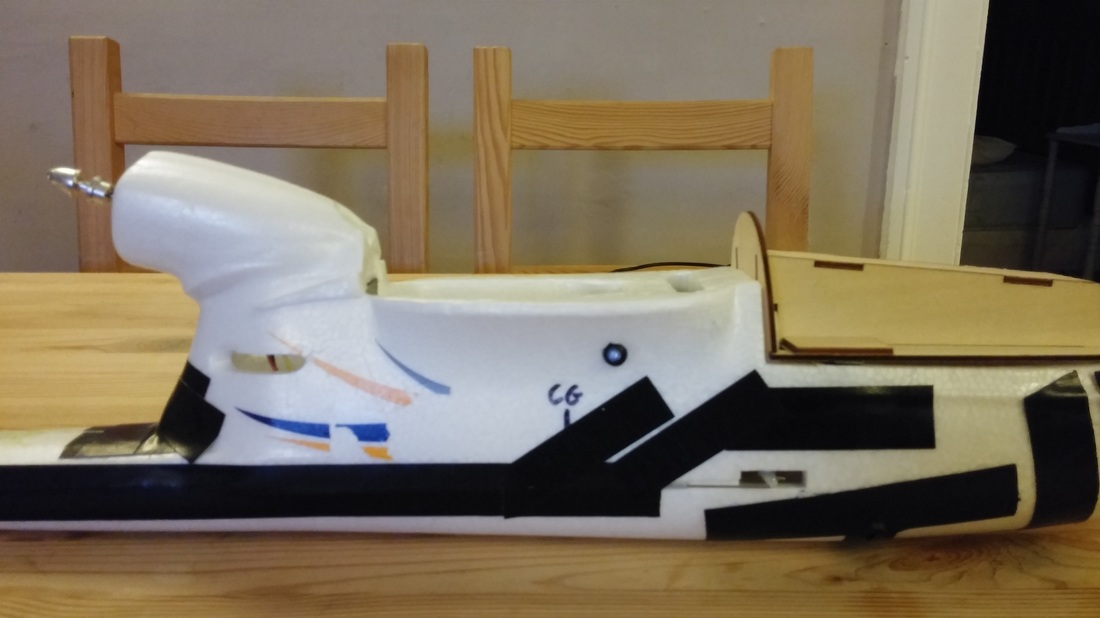 We then placed Velcro strips on either side of the plane where we are going to attach the detector and recorder, and on the devices. This makes it easy to attach and remove the devices.
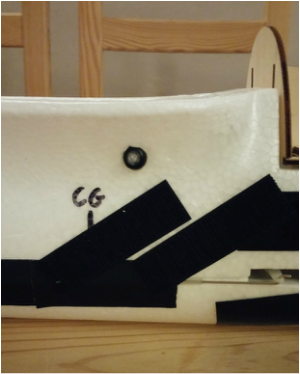
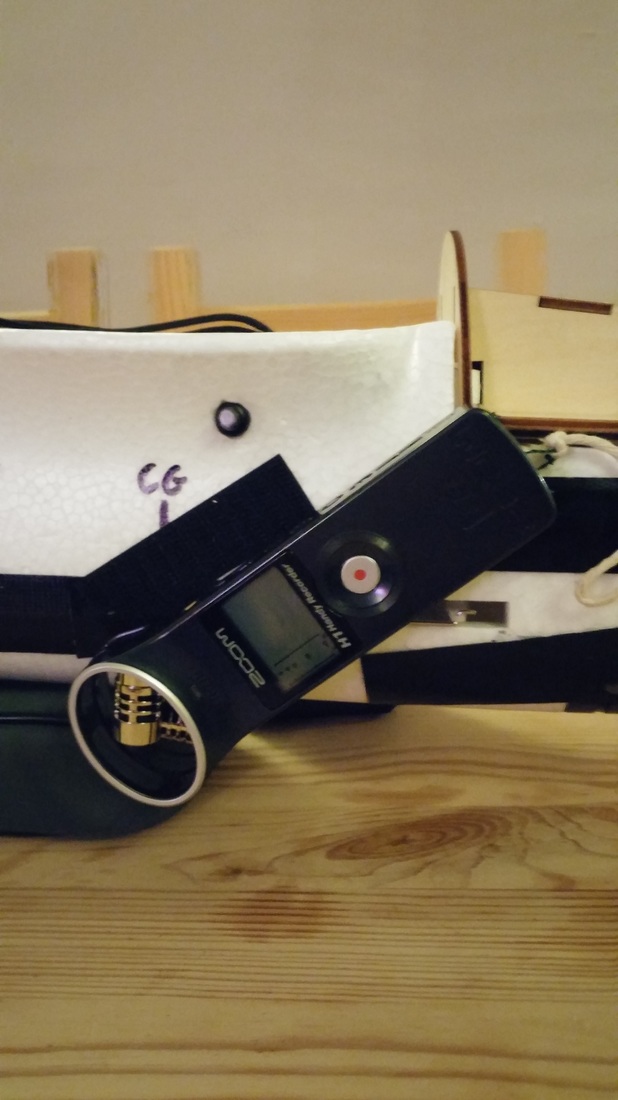
First we found the center of gravity and marked it on the side of the plane 'CG' 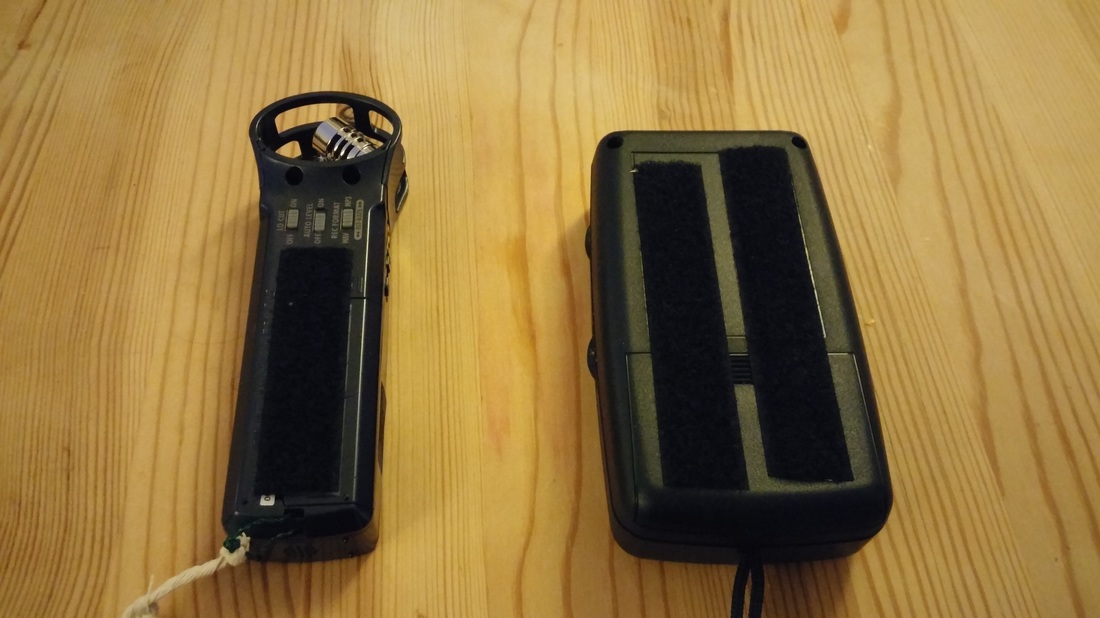 The detector and recorder fitted on really nicely to the Velcro which seemed pretty secure.
To make sure that these don't fall off we put the lanyards around the pins that secured the wings, when the wings are in place this means there is no way they can fall off even if the Velcro fails. 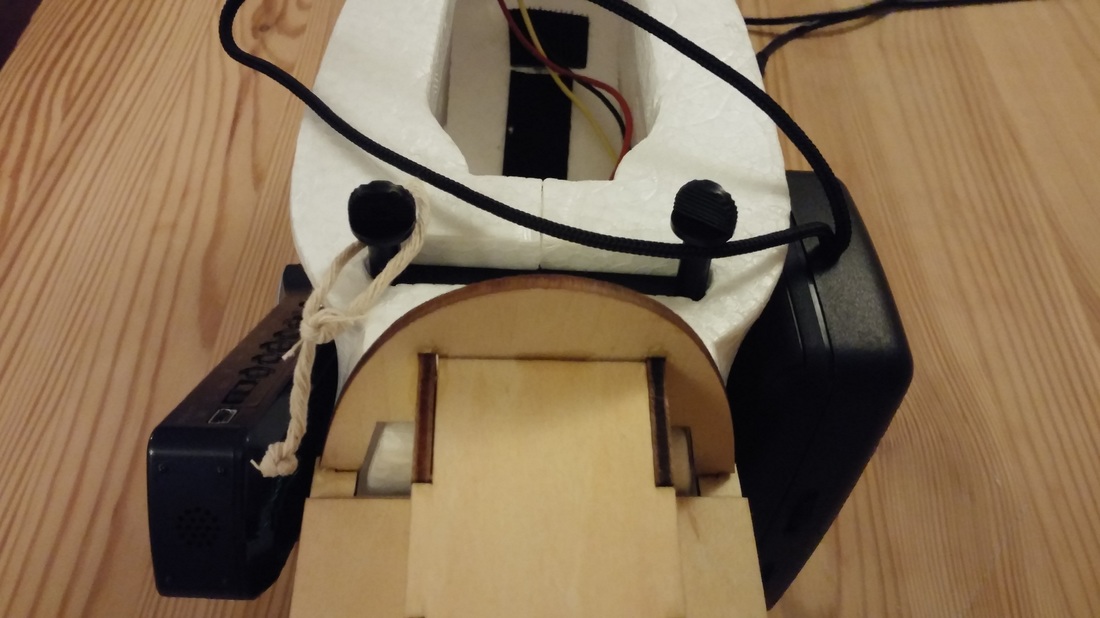 Next up we'll try testing the rig in flight and seeing if we can record some ultrasound!
Having pretty much decided now that a quadcopter is just too noisy for this project, we've taken the plunge and are now the proud owners of a Hobby King Bix 3: 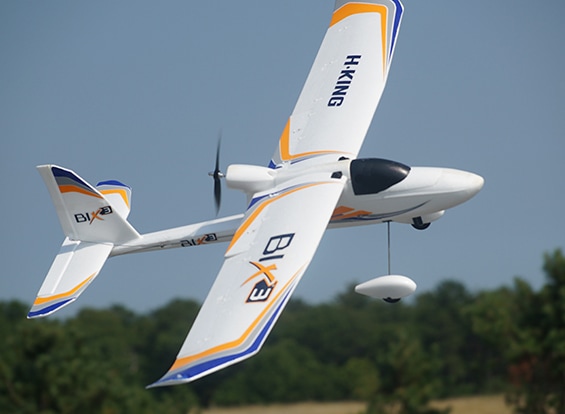 This plane was chosen primarily because it fulfills some basic requirements:
Once we'd put the plane together we needed to get into some flight testing. The first flights used manual mode. These went badly due to a poorly managed centre of gravity (CG) which needs to be accurately placed. Here's the result which we had to patch up: 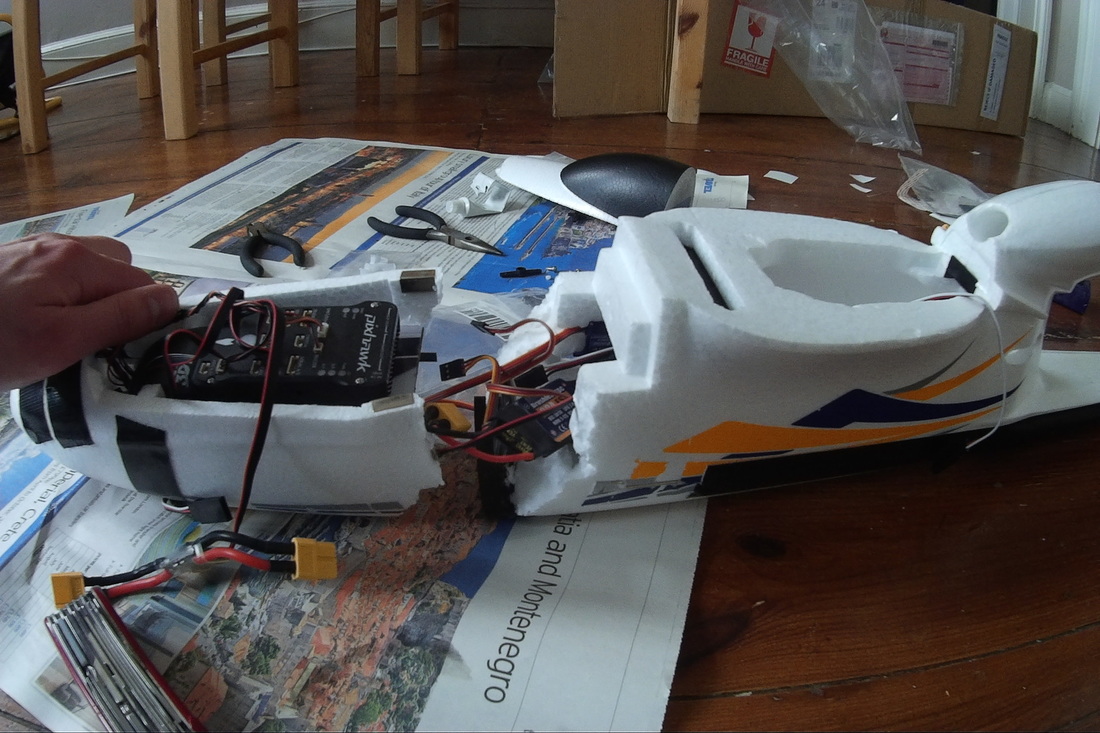 First successful flight now done we can move on to testing more features of the flight controller. Most important of these is the autopilot which will fly between a set of waypoints. Here's a map of the first route we'd set for our plane: When we turned on stabilisation mode (something to assist with flying) this was somewhat of a disaster as it turns out that the aileron controls were reversed in the flight controller leading to further crashes. A somewhat large amount of gluing and fixing later and we finally we worked out how to use our plane and using Fly-By-Wire-A mode. We achieved successful stable and in control flight with this mode. We were pretty chuffed as after the numerous crashed we'd given ourselves about a 25% chance of achieving a decent flight this time round. 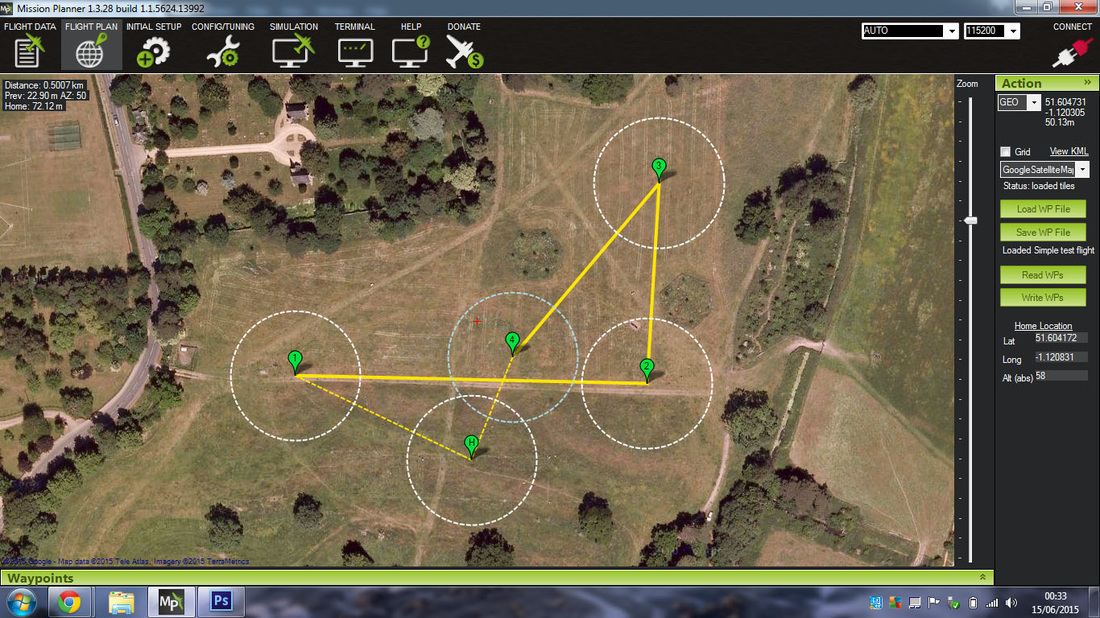 And below is the plane actually flying the route. Note that the waypoints are are in three dimensions so not only are they points on the map but they also have altitudes. We'd designed a route for our plane that took it to 50m altitude (relative to the ground level where we took off from). 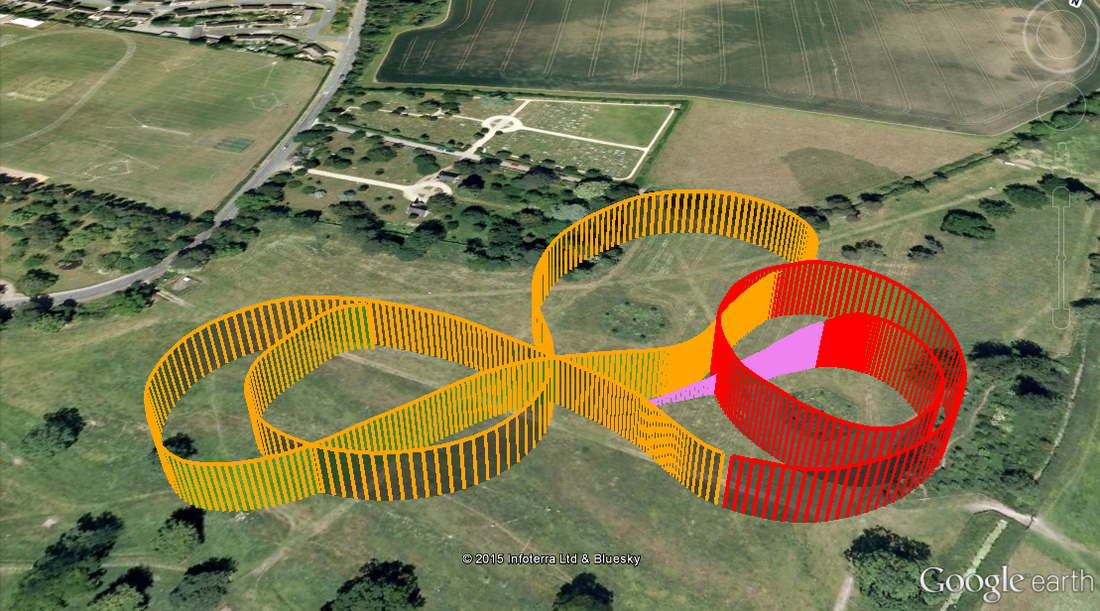 So what have we achieved? We now have a functional platform which can perform autopilot routes! Despite the crashes t's been a very successful weekend. We're looking to move onto longer autopilot routes next time and in-flight testing of the ultrasound recording equipment. There are already quite a lot of people exploring the possibilities that drones offer the world of conservation. Thankfully this means we don't have to start from scratch. |
Categories
All
Archives
March 2017
|
 RSS Feed
